A Classic Hairbun
I love pretty hairstyles but my own hair is often an afterthought- I'll spend half an hour doing my makeup but I'll leave 30 seconds for my hair. This often leave me with only two options- a ponytail (which can sometimes come across a little sloppy) or a bun, which has a greater likelihood of looking like an intentional style choice. And buns are great! Maybe it’s because of the close association with ballerinas, but for me the image of a neatly coiled hair bun has always brought to mind fantastic words like polished, elegant, feminine, timeless. I also love how such a simple hairstyle can be so practical and yet so alluring too; everything is pulled out of your face so you can get things done, but at the same time the hair being pulled up and out of the way draws focus to the nape of the neck, which is a very pretty area that is not often given due attention unless you have a very short haircut! A bun can be placed high on the head or low, depending on your preference, but I generally find that securing my hair too high on my head (whether in a bun or a ponytail) ends up giving me a wicked headache, so I prefer lower styles.
So far so good right? What could be more simple than pulling your hair back into a ponytail and then rolling it into a bun before securing with an elastic- it’s just one extra step. Wrong! I discovered early on that if you try to secure a bun with a hair tie, it will invariably end up looking something like this:

It will also not be a very secure bun (unless you tie the elastic really tight, which hurts) and rather prone to a floppy droopiness (which will be worse the tighter you tie the elastic.) Not the picture of nonchalant grace one would hope to create. I thought perhaps the problem was the elastic, which does kind of push out the base of the bun (thereby creating the dreaded “long bun” effect).

Perhaps the answer was bobby pins! So I tried rolling my hair into a bun and using bobby-pins to secure the bun in place. This worked reasonably well for a time; the bobby pins held my bun fairly flat against my head and eliminated the droop, which was very satisfying. However, my bun was rather small overall as I don't have thick or very long hair. Also, because the entire coil of hair was held in place only by tension and bobby-pins, I found myself have to use tons of pins and even then, as the day wore on my bun would get looser and looser. I tried using a long hair stick and that worked fairly well too, but periodically it would slip loose and I would have to clutch at my hair to find the pin and redo my bun. However, it worked fine for the most part and for the longest time that’s exactly how I did my hair.

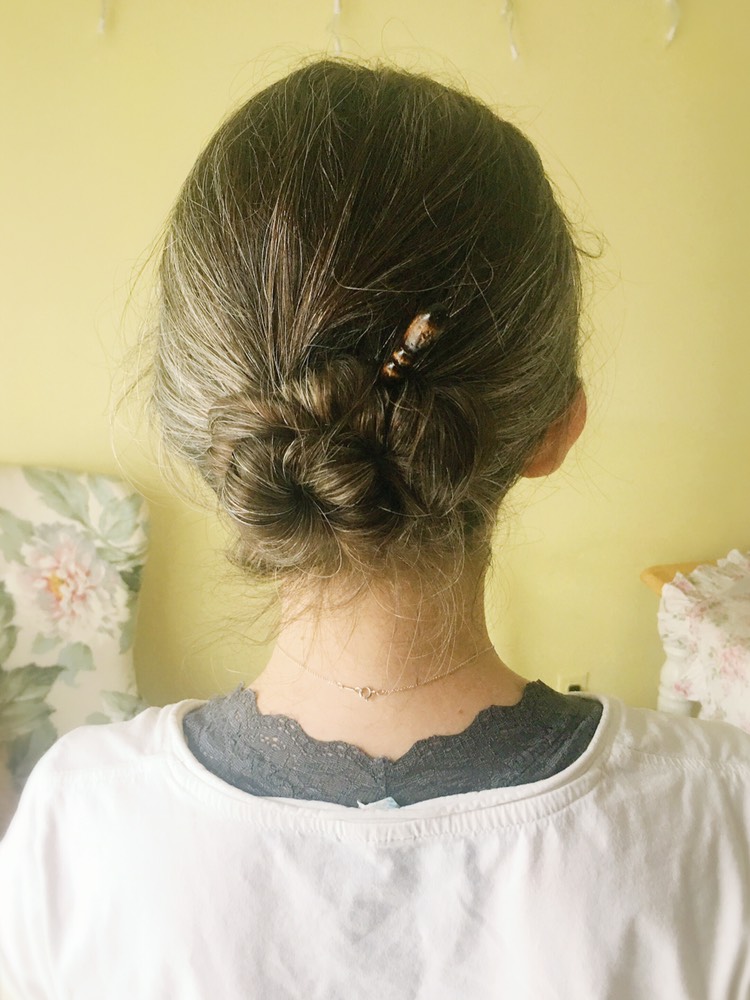
Until yesterday, when I crafted this bun masterpiece, which I call a double-coil bun. It doesn't stick out very much, or droop or sag, but at the same time it's quite satisfyingly large when looked at from behind. It think it created a very nice illusion that my hair is longer and/or thicker than it actually is.

It may look mess because of all the flyaway hair and the general lack of sleekness, but I loved how it felt and looked. My hair is medium length and heavily layered, so I don't actually get a very impressive coil when I'm doing a regular bun. It sorts of curls around once and then peters out into nothing, so the end result looks looks somewhat small and unimpressive on the back of my head. This new bun technique actually involves two coils of hair, which together make one bun that ends up looking larger and more voluminous. I can’t photograph or record myself doing my own hair at the back of my head, so I hope the following doodles/illustrations will do the trick of providing a handy visual.

Step 1: Separate hair into two sections. No need to worry about making a neat part or anything like that because when you’re done your hair should look evenly pulled back with no visible part.
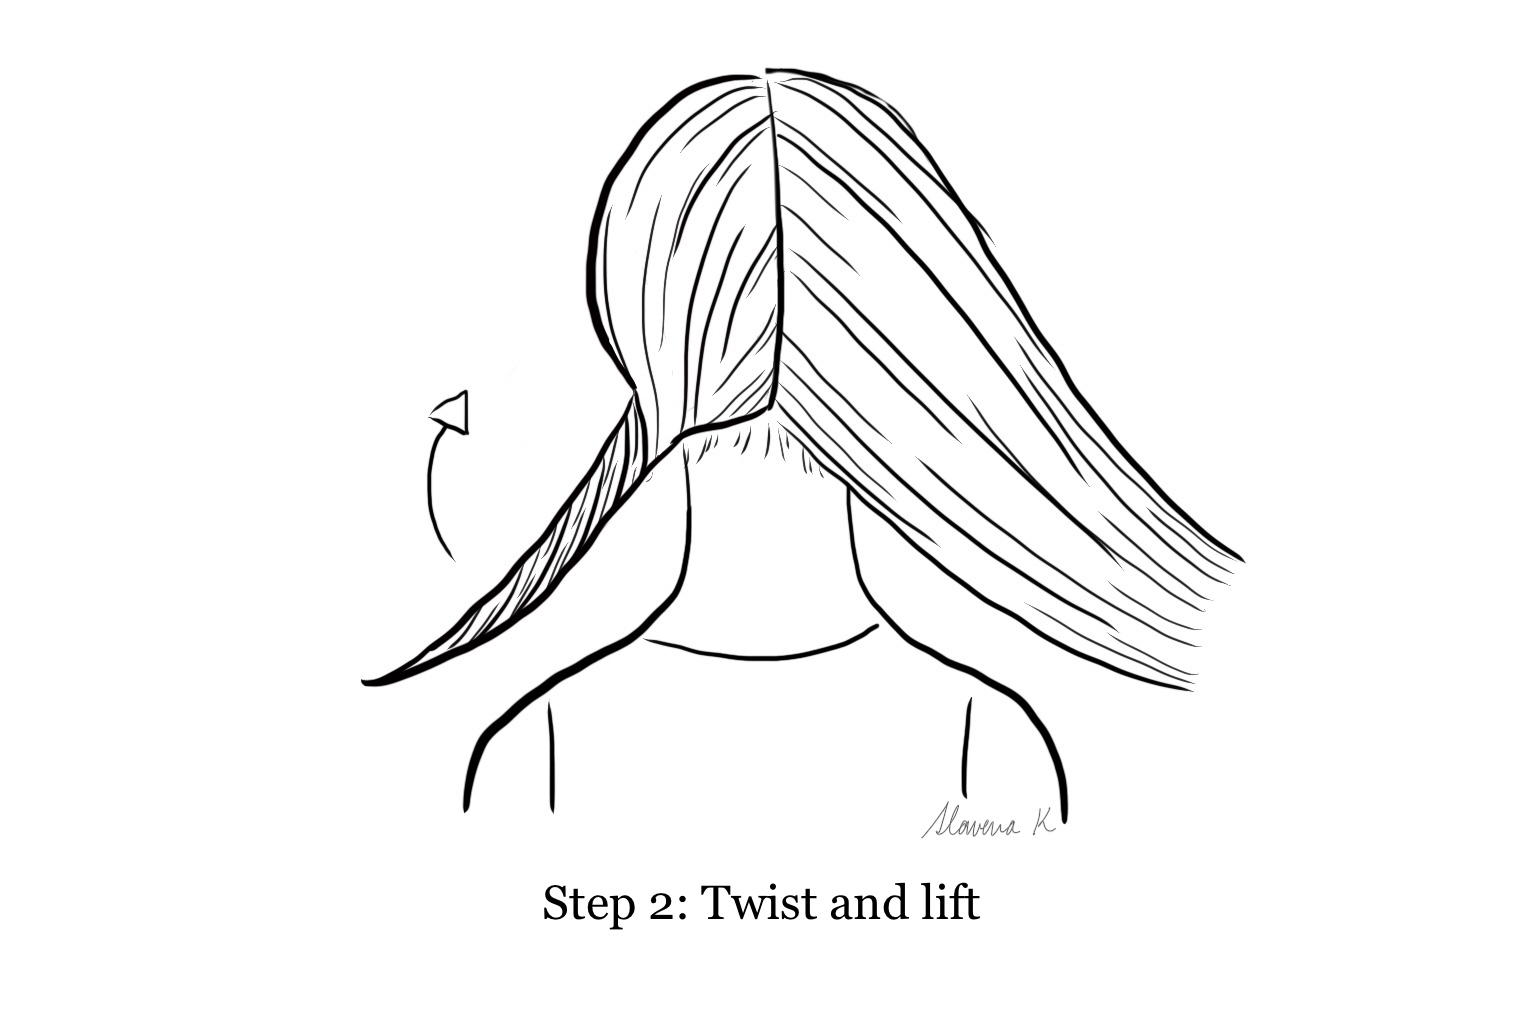
Step 2: Take the hair on your left side and start twisting it away from your face, As you twist, start lifting the coil of hair in the direction you plan to take your bun. Keep it tight!

Step 3: Make your first hair bun. Try to position it so that it’s fairly centered. Normally, if I was doing a regular bun, this is about the size the finished bun would be! Not very big is it?

Step 4: Secure with one or two hairpins focusing on the end, I put mine as shown above (the pink lines) but depending on your hair length you may need to put your pins elsewhere along your bun.

Step 5: Take the section of hair on your right side and do basically the same thing- twist your hair into a coil (but this time towards your face) and start lifting as you twist.

Step 6: As you lift, position this new coil around the outside of the first bun you made. You're not placing a second bun on top of a bun, you're just expanding the area of your bun by adding the second coil around the first bun you made. The entire thing should lay flat against your head.

Step 7: Secure this second coil with two more hair pins, again focusing on the end of the coil to make sure the tail is tucked firmly away and won't come loose. Then take your long hair stick/ hair pin and poke it through both coils to secure the entire bun in place.
And voila! With this technique the weight and bulk of the bun is spread out in two sections, so it’s not as internally heavy and it’s easier to secure to your head without the weight of your hair pulling it down and out of shape. The double coil creates the illusion of longer hair, which is nice. I’m sure this bun technique must’ve been done before by someone else; in my case I was just messing around with my hair after a shower and it happened to work out, so I thought I’d share!

Another nice thing about the double coil bun is that if your hair is damp when you do it and you let your hair dry while in the bun, you'll get pretty decent curls and without having to use any heat! My natural hair texture is slightly wavy (and prone to frizziness!) but whenever I let it dry in a bun I do get curls and ringlets. The ringlets aren't evenly distributed in size when I do a single coil bun, but since the bun I did yesterday divided my hair evenly into two coils, the curls I got today where much more well spaced and even in size. A very happy bonus!
** This post is not sponsored in any way.**


Comments
Post a Comment